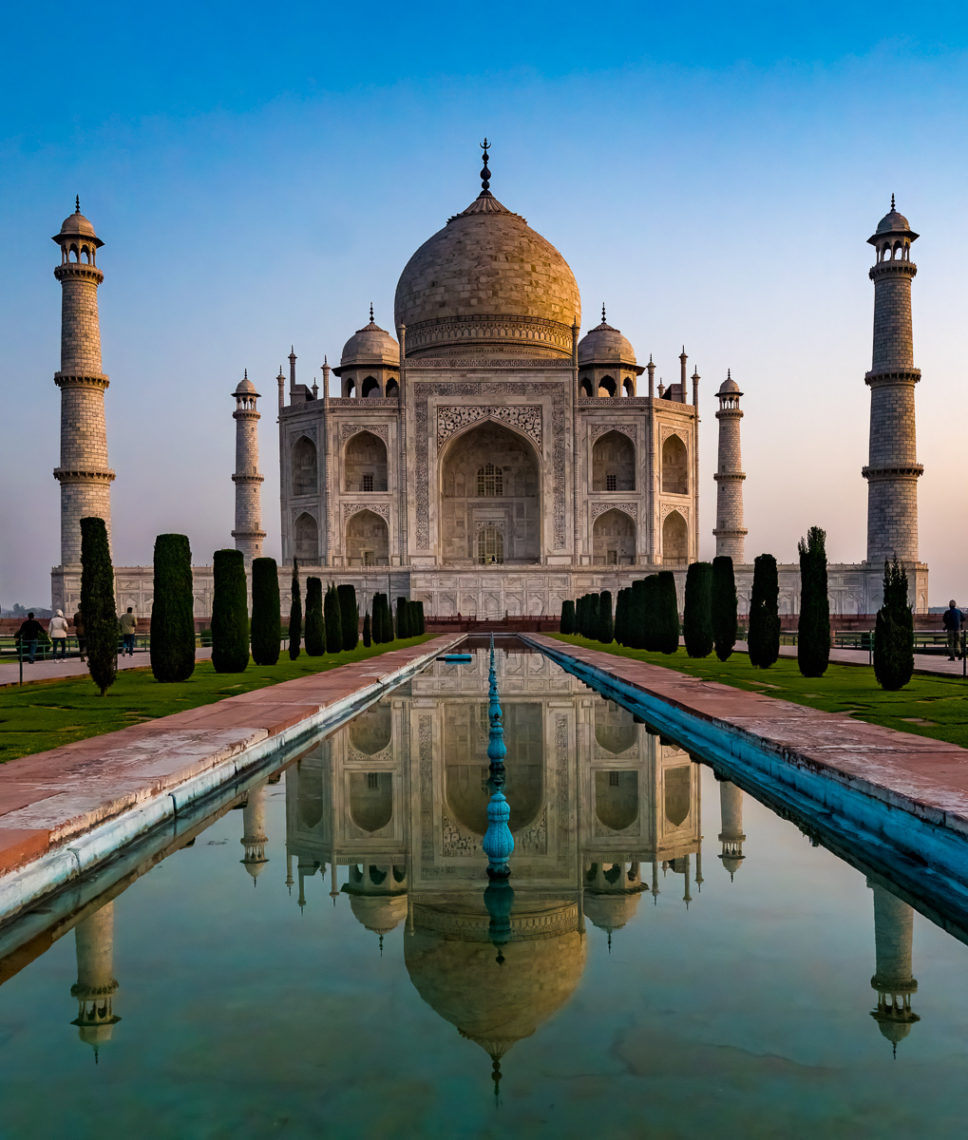
When you think of India, the image of the Taj Mahal emerges near the top. A UNESCO World Heritage Center and one of the new seven wonders of the world, the tourists line up starting around 5 AM. It’s considered the greatest love monument ever constructed. Taj Mahal, Crown of the Palace, is an ivory white marble mausoleum built in 1643 for the wife of a maharaja, then a tomb for himself. It was designated as a UNESCO World Heritage site in 1983 for being the jewel of islamic art in India and considered regarded by many as the best example of Mughal architecture. More than 8 million people visit the Taj each year, and the Taj is in the most recent new Wonders of the World. It has been photographed so often that our challenge was to add something unique and distinctive.
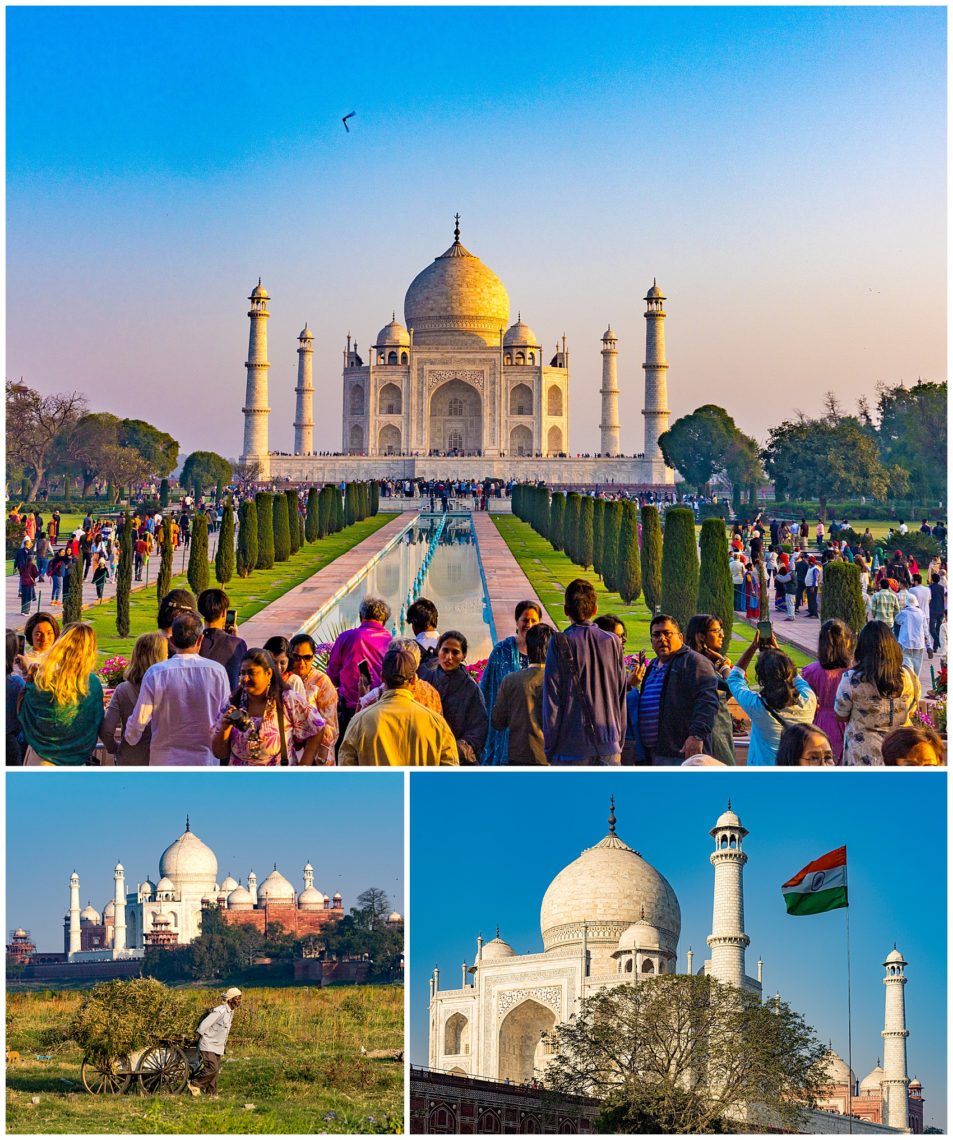
The top image is what most tourists see at sunrise, the beautiful dome with crowds of people. When entering, there’s a security line, and men and women are in separate lines, getting patted down. The alternate image (lower-left) is right across the river, unknown to most except the locals. Farmers, motorbikes, and locals walking home were all using the road for every day, living with the monument in the background. On the lower-right is a shot with the Indian flag.
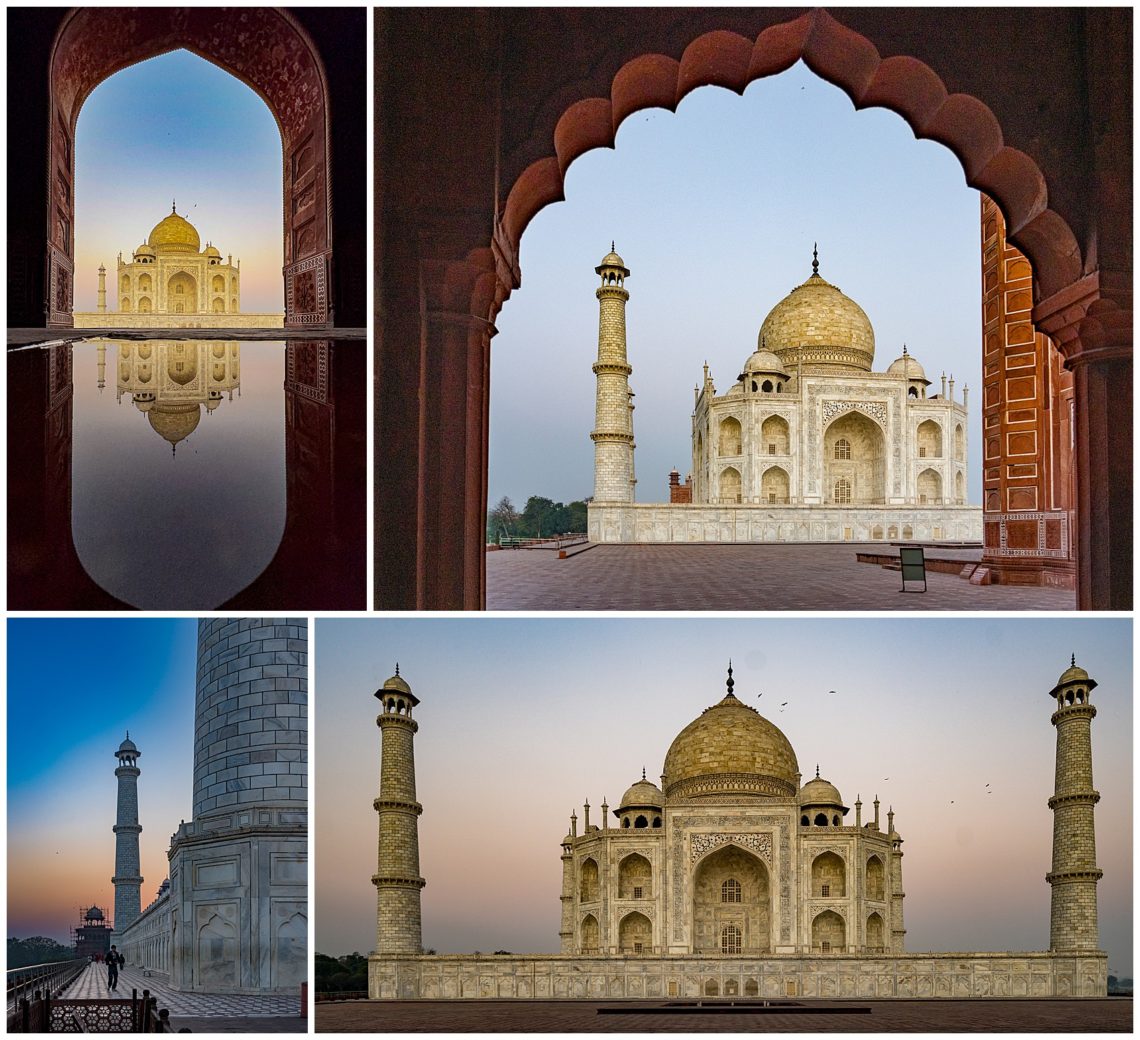
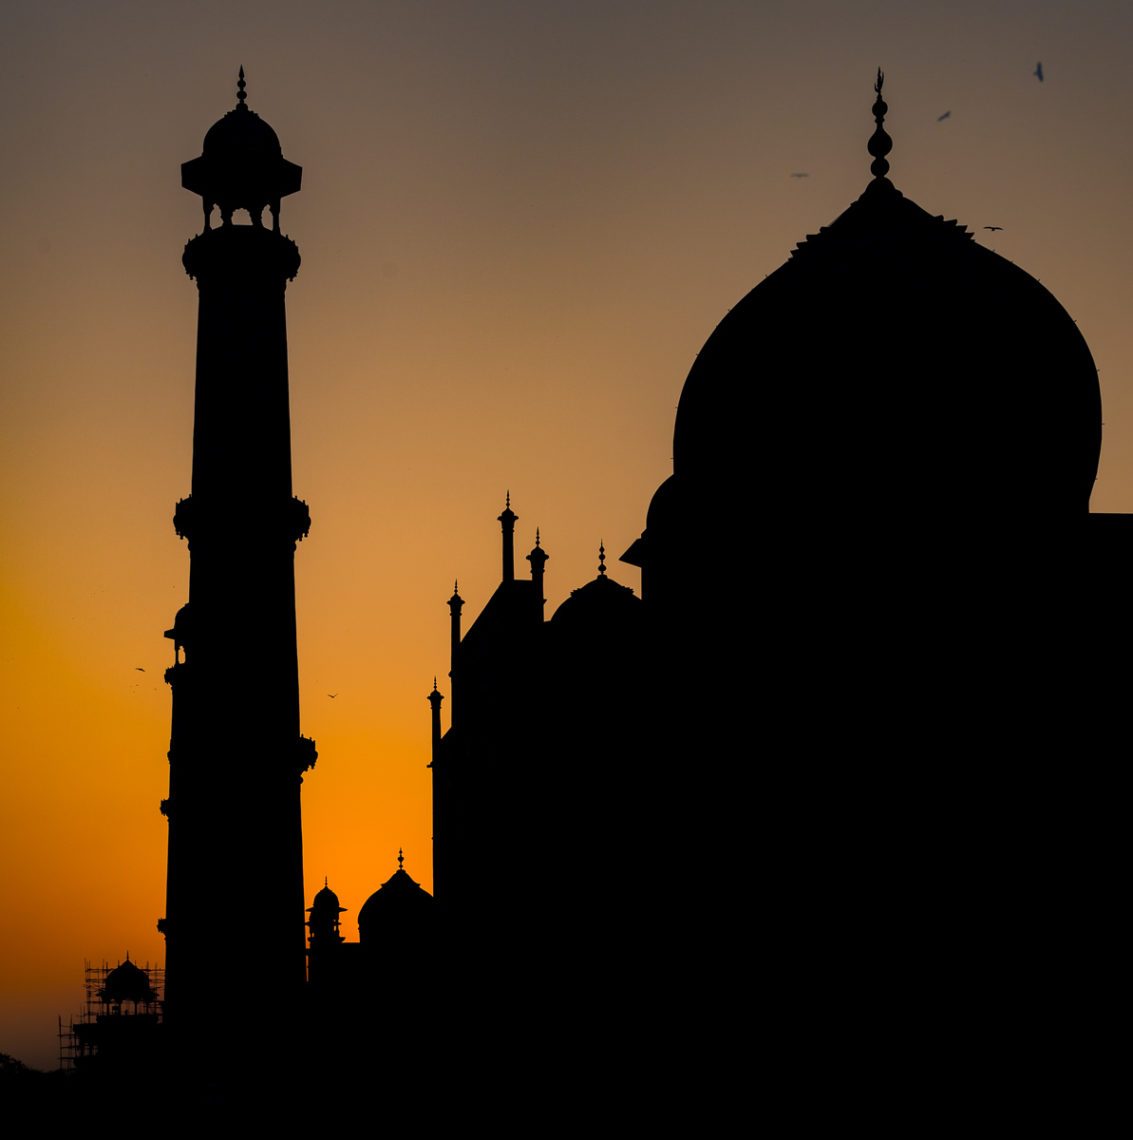
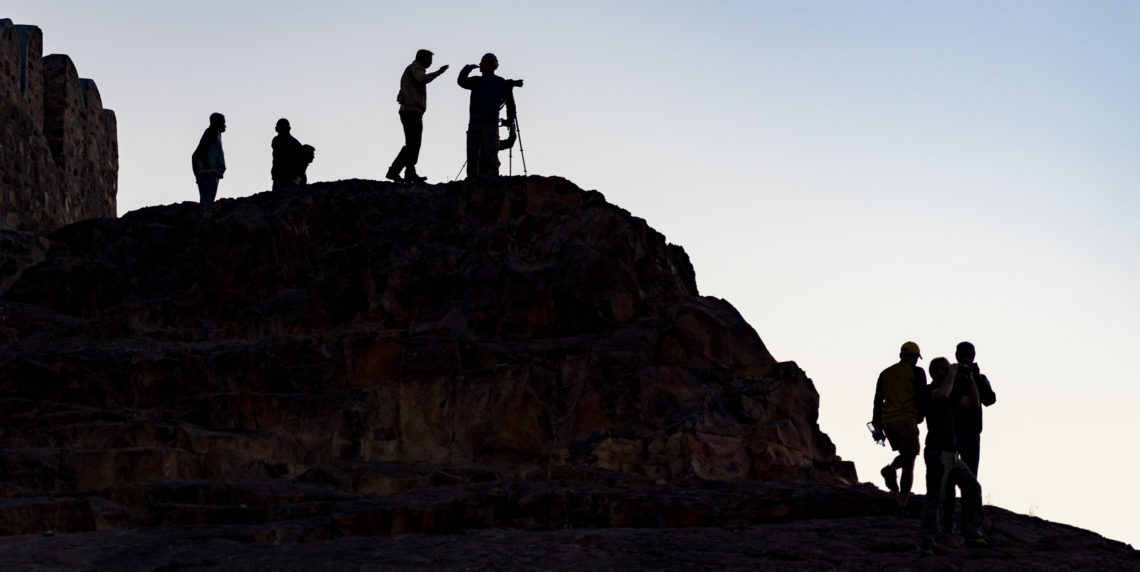
Here are some more interesting images of the Taj that we captured this time. When you want reflections, you can bring your own bottle of water and create your own tiny pool (Top Left). Then there’s framing the building with other architectural features across a courtyard (top right), using leading lines toward sunset (bottom left), and the straight shot from across the river. Of interest, the four minarets were designed to tilt away from the dome in case of a disaster, and not fall into the dome. By getting in line well before dawn and beating the crowd, we were able to capture a number of images without tourists.
Unfortunately, the river in front of the Taj is full of garbage, which is a major eye sore throughout India. With so many people needing work, it seems like setting a goal of clean and green could be a tremendous boost for tourism and help create jobs in India, which has become the most populous country. Unfortunately, 83 of the cities in India have been designated the most polluted in the top 100 list in the world. It took China a decade to clean up their air quality, and get off the list.
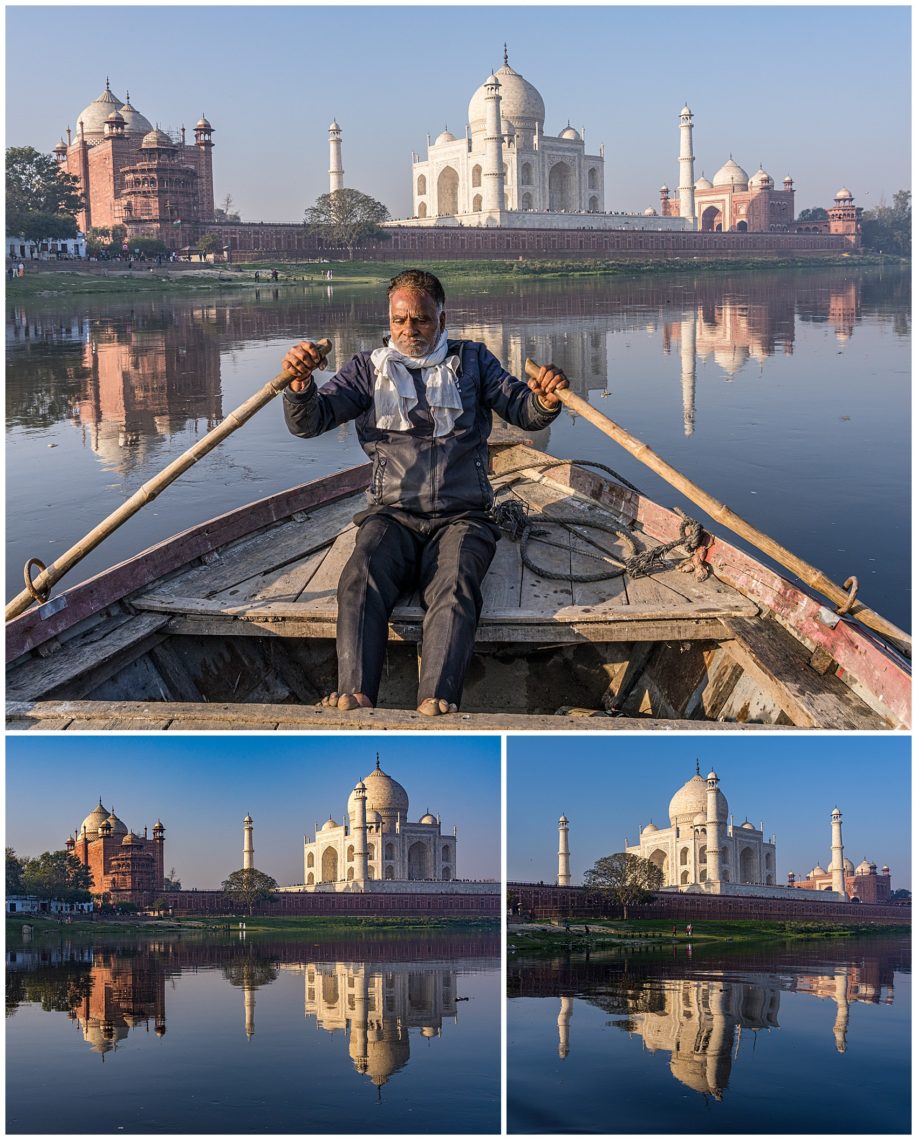
In the past, you could hire a boatmen to take you on a sunset ride in front of the Taj. Now, there are boundaries controlled by the coast guard where no boats can enter in front of the Taj for security reasons. Mehmet managed to hire one old boat captain with a rickety wooden boat, where he was baling excess water from the bottom of the boat before we arrived. There were no seats except literally sitting on the top deck of the boat(with no benches nor seats), and the balance was sensitive. To capture the reflections, only one person was allowed to stand at a time, and the boat would rock, and we worried whether we would fall off into the current. There was a strong current, so it was not an easy task for the boat captain to get back to the other side of the river. Apparently, he has no mobile phone, nor any easy way to contact him, and he does not legally have a permit. He is unofficially “grandfathered” in, and guards turn a blind eye to his small daily trips out to the river. The location with the Taj in the background was great for instagrammers and wedding shoots. The TV show the Amazing Race Film Crew was there, setting up to film their next segment.
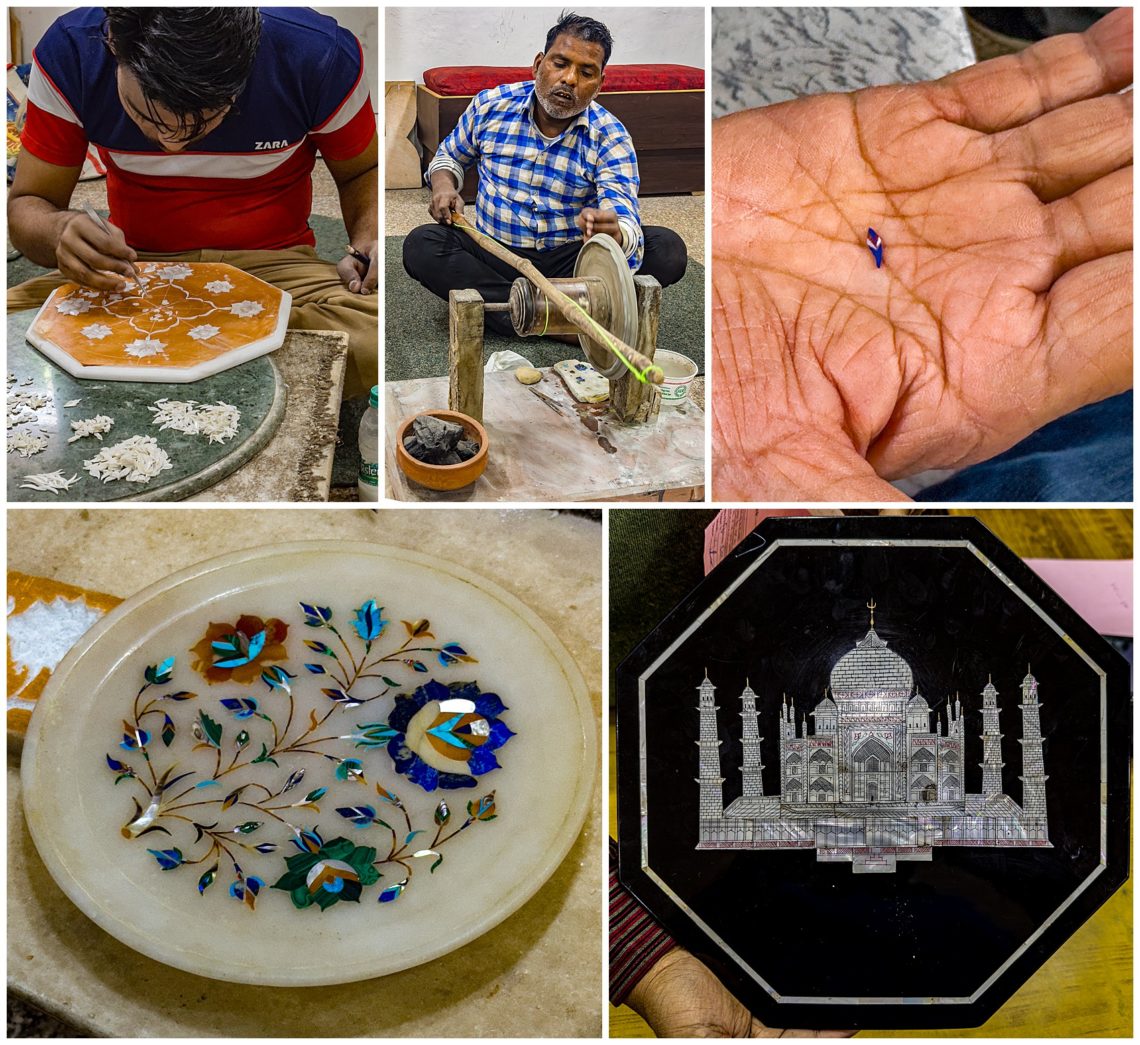
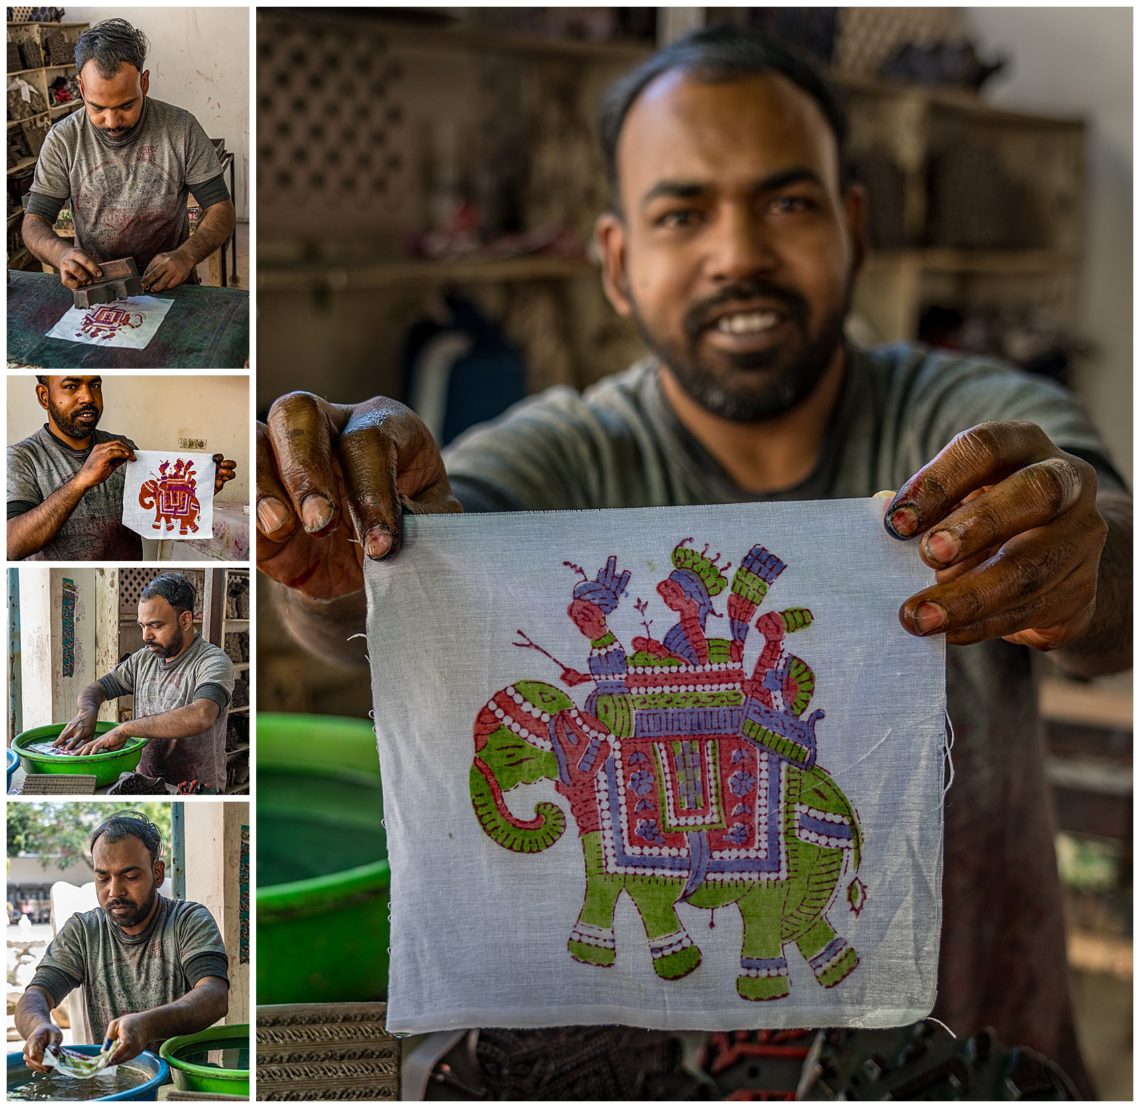
Nearby was a marble shop demonstrating how precious stones are inserted into the marble. This shop follows the traditions originally used by the Taj Mahal creators. Each stone is finely ground (top-middle). When the artist showed us the gem (upper-right), I was amazed at tiny the piece was. It is then precisely placed onto the piece being created (upper-left), to result in a finished product, such as seen lower-left.
Of course, we had to have our own memories of the Taj Mahal, so we bought this cutting board (lower-right).

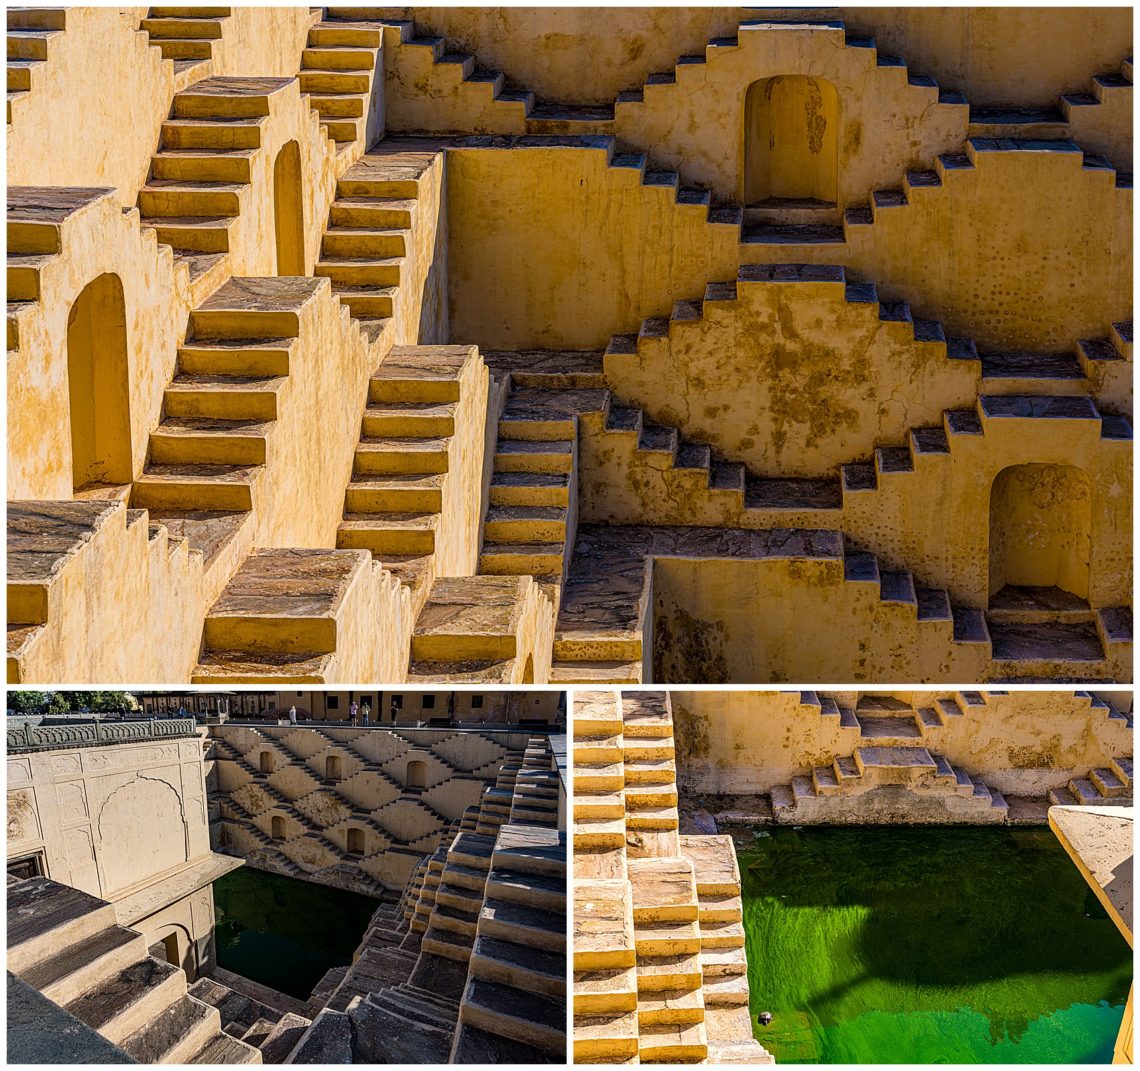
Chand Baori step well is one of the largest and deepest step wells in India. There are 3500 steps leading down this 13-story well, with a palace on the back side.l As mentioned before, we had never heard of step wells until this trip, and they turn out to be architectural masterpieces. Mehmet was always searching for models to walk up and down the stairs to show the scale, though many of the wells had barriers and guards to prevent anyone from entering the steps.
These people were hanging out next to the Stepwell. The boys were in a contest wanting us to take their photos (lower-left).
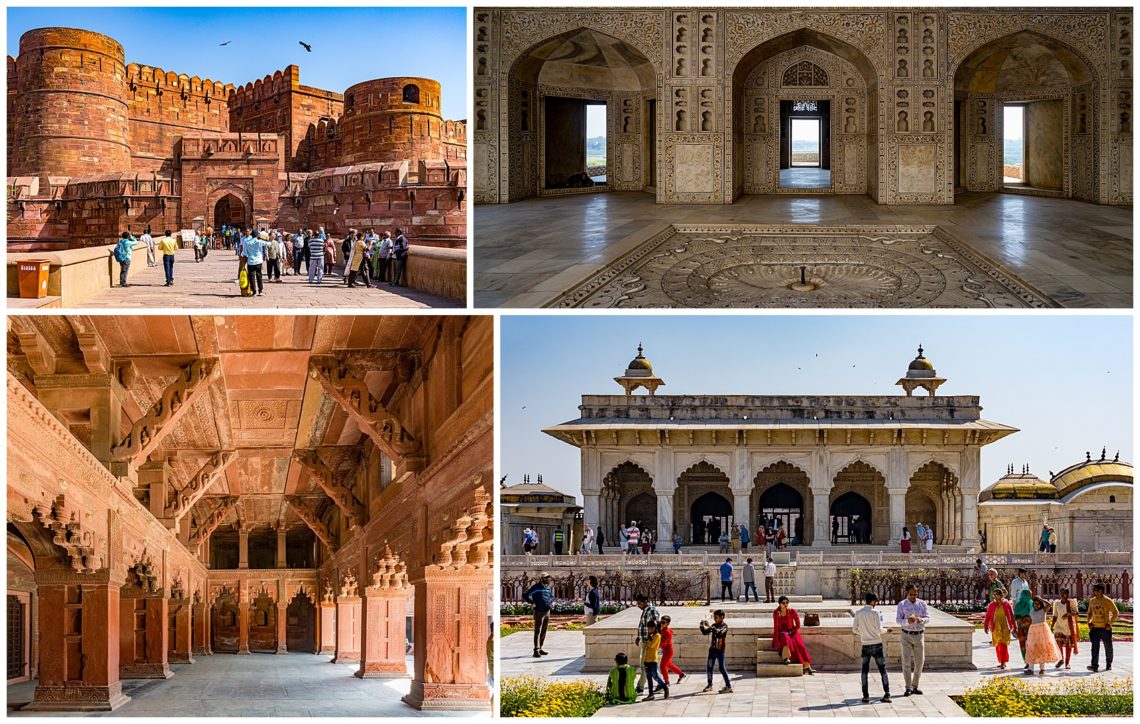
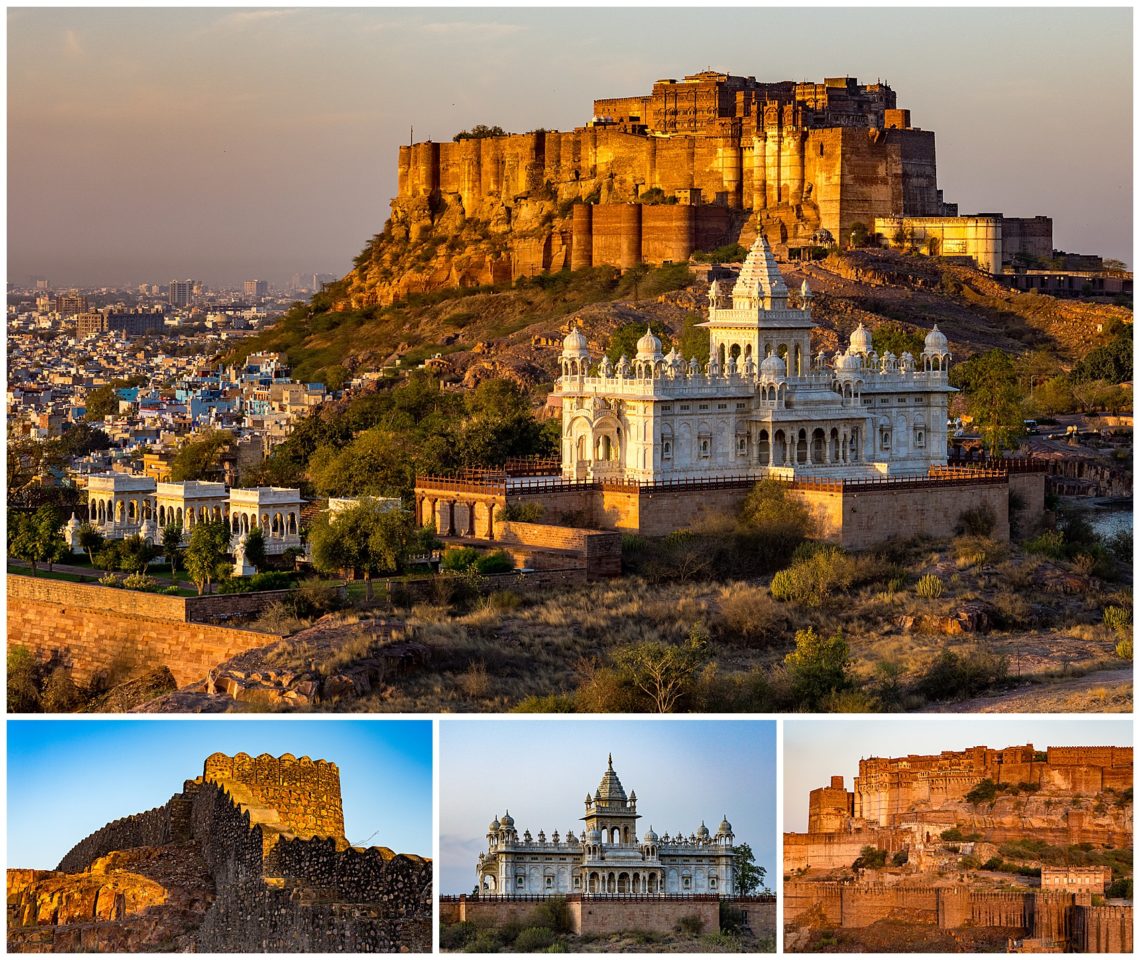
Agra was once the capital city of India, so you will enjoy seeing forts, mausoleums, and other monuments. In Agra is the Agra Fort, which is also a UNESCO World Heritage site. It was the main residence of the emperors of the Mughal Dynasty until 1638.
We last visited the Taj Mahal in 1995, before we got serious about photography. This time we were able to see this monument from many more viewpoints, including one where we walked across nylon fighting kite strings across the field to see reflections of the Taj on a river filled with garbage (the string and garbage was carefully edited out of the photos we shared).